
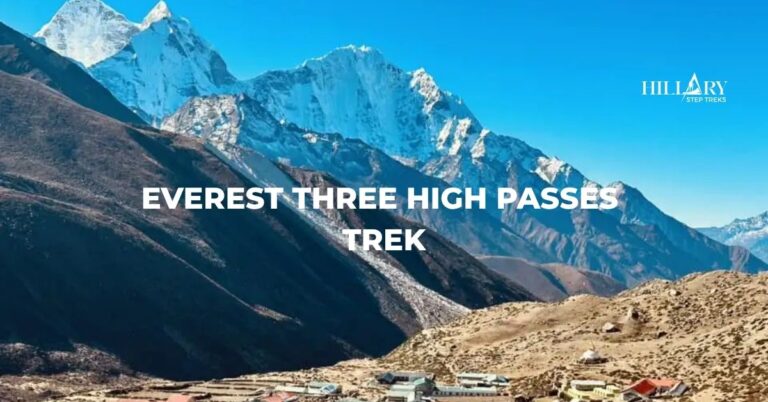
The Everest Three Pass Solo Trek Guide introduces one of the most complete trekking routes in the Everest region. This trek brings together Everest Base Camp, the Kalapatthar viewpoint, the Gokyo Lakes, and the beautiful summit of Gokyo Ri into one long circuit. What makes this trek special is that it also crosses three high mountain passes, Kongma La (5,535m), Cho La (5,420m), and Renjo La (5,360m).
A solo trek to the Everest Three Pass does not mean walking in total isolation. In this context, solo trekking means trekking without a guide or porter while still following commonly used trails with lodges, teahouses, and other trekkers. During peak seasons, you will meet fellow trekkers at teahouses and on the passes, around Everest Base Camp, Gokyo, and the main trail sections.
Table of Contents
Solo trekking the Everest Three Passes is not recommended for beginners. This route involves long walking days, high altitude, changing weather, and repeated climbs above 5,000m. It is strongly recommended that you have past trekking experience, and even better if you have completed multi-day treks at altitude before. Experience helps with rhythm, understanding your body, and making safe decisions when conditions change.
What makes Solo Trek Special?
The Everest Three Passes Trek is special because it offers the most comprehensive experience of the Everest region. It combines all the highlights of the standard treks into one long journey. Below are the key reasons that make this solo trek special.
Solo Trekking Means Freedom & Flexibility
Solo trekking gives you full control over your route and daily choices. You can decide whether to walk the trail clockwise or in the opposite direction based on weather and trail conditions. If your body needs more rest, you can add extra days in Namche Bazaar or Dingboche, or slow down without pressure. You can add side trips like Gokyo Ri or Chhukung Ri when the weather is clear. You can also skip them if you feel tired. Your trek starts and ends the way you choose, whether from Lukla or from road points like Salleri or Jiri.
Covers Major Everest Region Trekking Destinations
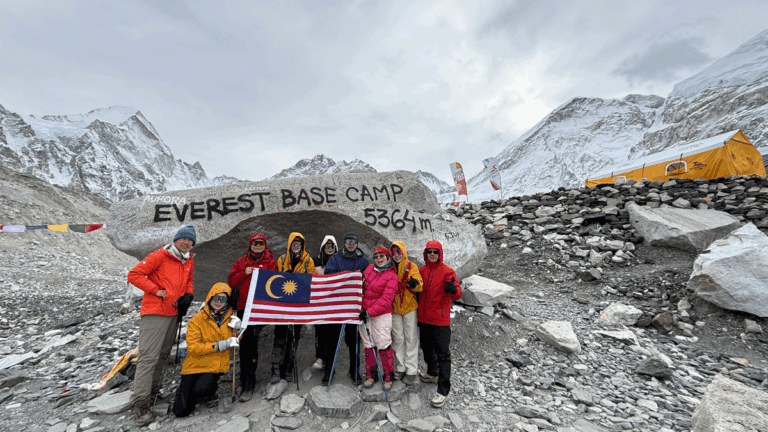
The Everest Three Pass Solo Trek covers almost all the major destinations in the Everest region. You start with Namche Bazaar and continue to Tengboche Monastery. The trek also takes you to the final destination of the Everest Base Camp trek, the starting point for Everest summiters, and Kala Patthar, where you get the best sunrise views of Everest, Lhotse, and Nuptse. Beyond the EBC highlights, the trek reaches Gokyo Valley (a Ramsar conservation site) and Sherpa villages like Thame, Marlung, and Chhukung.

More Authentic and Commitment-Driven Adventure
The Three Pass Solo Trek is known for being a truly raw and commitment-driven adventure. You must be ready for 18–21 days of trekking, which covers around 160–170km. Daily walks last 6–9 hours and require focus, balance, and both physical and mental strength. This trek offers an authentic experience through cultural immersion. You pass remote villages like Thame and Chhukung, where Sherpa communities continue traditional farming and herding. Poor network in these remote areas gives you a short digital break and helps you connect more with nature and spiritual places like Tengboche Monastery.
Map and Navigation for Three Pass Trek
The Everest Three Pass Solo Trek can be done in either a clockwise or anti-clockwise direction; the choice is yours. Clockwise begins with Renjo La, Cho La, EBC, and Kongma La Pass, whereas Anti-clockwise starts with Dingbuche, Kongma La, EBC, Cho La, Gokyo Valley, and Renjo La. Either way, your trek will cover the major highlights like Namche Bazaar, Tengboche Monastery, Everest Base Camp, Kala Patthar, and the Gokyo Lakes trek.

Based on our itinerary, we opted for the anti-clockwise route as it helps you to gain altitude slowly before tackling the first and toughest pass, Kongma La. This approach improves acclimatization and lowers the risk of altitude sickness. The map in our package shows the full loop, including the three high passes, major villages, and key viewpoints. You can attempt either the clockwise or anti-clockwise route, but choosing the anti-clockwise option will favour you more.
Everest Three Pass Solo Trek Difficulty
This trek is one of the hardest non-technical treks in Nepal. You spend many days above 4,000m and cross three high passes that rise over 5,300m. Kongma La reaches 5,535m and involves rocky uphill climbs and a glacier crossing. Cho La includes icy sections and a glacier where traction is needed. Renjo La is slightly easier but still requires long climbs. Overall, the full circuit covers around 160–170km, and pass-crossing days can last even longer.

Solo trekking adds more difficulty and responsibility. Trails near glaciers like Khumbu and Ngozumpa can change and may disappear after snowfall. Navigation becomes harder during bad weather and whiteout conditions. Altitude sickness is a serious risk since early signs like headache or nausea are easier to ignore when alone. Some sections have no teahouses or water sources between Chhukung and Lobuche, which means full self-reliance for the day. So it’s best to plan carefully and hire a guide, as solo trekking is not permitted in 2026.
What Permits are Required for Everest Three Pass?
To do the Everest Three Pass Trek, you need two permits. The first is the Khumbu Pasang Lhamu Rural Municipality Entrance Fee that supports local infrastructure and services in the Everest region. The second is the Sagarmatha National Park Permit, required to enter the protected national park area. Here’s a detailed cost breakdown in a table:
| Permit Name | Nepalese Citizens | SAARC Nationals | Other Foreigners |
|---|---|---|---|
| Sagarmatha National Park Entry Permit | NPR 100 | NPR 1,500 (USD 10.5) | NPR 3,000 (~USD 23) |
| Khumbu Pasang Lhamu Rural Municipality Permit | Free/Exempt | NPR 2,000 (USD 14) | NPR 3,000 (~USD 23) |
Note: SAARC countries include India, Bhutan, Sri Lanka, Bangladesh, Maldives, Pakistan, and Afghanistan.
Cost and Budgeting your Solo Trek to Everest Three Pass
A budget for an 18–21 day Everest Three Pass trek ranges from about USD 1,920 to 2,500, excluding international flights and personal gear. This cost covers permits, Lukla flights, food, and teahouse stays. Expenses rise with altitude because food and lodging become harder to supply. Prices are lowest in Lukla and Namche Bazaar and highest in places like Gorakshep and Gokyo.
Most of your spending goes toward flights, meals, and accommodation. A round-trip flight between Kathmandu and Lukla costs between USD 360 and 440. Teahouses charge less in lower villages and more above 4,000m. Meals cost more as you go higher and can reach USD 25–35 per day and extra services like hot showers, charging devices, and Wi-Fi also add up quickly.
Therefore, cash planning is important on this route. The trek is almost fully cash-based, and ATMs are not available beyond Namche Bazaar. Drinking water also affects your budget since bottled water becomes expensive at high altitudes. Using a water purifier saves money and reduces waste. Always keep an emergency reserve of USD 300–500 for weather delays or medical needs, since solo trekkers must manage these risks on their own.
Accommodation Facilities for Solo Trekkers on the Everest Three Pass Trail
Accommodation on the Everest Three Pass Solo Trek is mainly available in teahouses, where solo trekkers stay in simple rooms with twin beds, mattresses, pillows, and blankets. Most rooms are shared, although private rooms may be available in larger villages such as Lukla, Namche Bazaar, and Dingboche, usually at a higher cost. The dining room is generally the warmest area, heated by a central stove, while bedrooms can become very cold at night.
As you approach Kongma La, Cho La, and Renjo La, accommodation becomes more basic because these sections are more remote. Facilities are limited, and solo trekkers should not expect the same comfort or room choices available in lower villages. Toilets are commonly shared, with squat-style toilets more frequent at higher elevations. Hot showers generally cost around USD 3–8, while electricity for charging phones, cameras, and other devices is usually limited and charged separately.
For solo trekkers, it is useful to be flexible about room arrangements, especially during the busy trekking seasons. In popular villages, booking ahead can help secure a private room when available, while at smaller settlements, sharing a room may be the only practical option. Higher on the Three Pass route, the priority is usually a warm bed, food, and a safe place to rest rather than extra comfort.
What is the Best Season for Everest Three Pass Trek
The best season for the Everest Three Pass Trek is autumn (Sept to Nov), and Spring (Mar to May). Winter (Dec to Feb) and monsoon/summer (Jun to Aug) are generally not recommended due to extreme cold, heavy snow, or constant rain. Here’s a clear table.
| Season | Months | Highlights | Is it Best? |
| Spring | Mar–May | Blooming rhododendron forests in lower regions. Warmer and longer days. Active Everest expeditions to see. | Good |
| Autumn | Sept–Nov | Clear skies after the monsoon for mountain views. Stable weather. Comfortable daytime temperatures. | Best |
| Winter | Dec–Feb | Very cold nights (below -25°C). High passes may be blocked by snow. | Not Recommended |
| Monsoon/Summer | Jun-Aug | Frequent rain, leeches, slippery trails, flight cancellations, and fewer tourists. | Not Recommended |
Tips for Solo Hike to Everest Three Pass
- Consider Hiring a Guide: Even though technically not required, a guide improves safety on this challenging trek.
- Buddy Up for High Passes: Never cross Kongma La, Cho La, or Renjo La alone in snow or poor visibility. Link with other trekkers in the teahouses the night before.
- Carry Offline Navigation: Bring a physical map, compass, and GPS app with offline maps (e.g., Maps.me or AllTrails).
- Inform Others: Share your daily itinerary with your teahouse owner and a family member or friend at home.
- Get Proper Insurance: Ensure coverage includes high-altitude trekking above 5,000 m and emergency helicopter evacuation.
- Acclimatize Strictly: Schedule rest days in Namche Bazaar, Dingboche, Chhukung, or Thame. Follow the “climb high, sleep low” principle.
- Recognize AMS Symptoms: Watch for headaches, nausea, dizziness, or fatigue. Descend immediately if symptoms worsen.
- Consult Your Doctor: Talk about medications like Diamox for altitude sickness before the trek.
Conclusion
The Everest Three Pass Solo Trek offers everything in a single package. From EBC, Kala Patthar, Gokyo Lakes, and the three high passes. Solo trekking offers freedom and flexibility; however, it needs strong physical fitness, high-altitude experience, perfect planning, and strict acclimatization to navigate the trail safely. If you are ready for the challenge, this trek gives you a once-in-a-lifetime experience and helps you grow as a person.
Frequently Asked Questions
Expand AllCan I use a TIMS card instead of Khumbu permits?
I read that this trek is just a longer Everest Base Camp trek. Is that true?
What gear is essential for the trek?
How many rest days should I plan?
Can I legally add side trips to remote villages?